Entries in Gun Safety,How To

Safe Air and Blank Gun Storage Unit On a Budget

No Comments

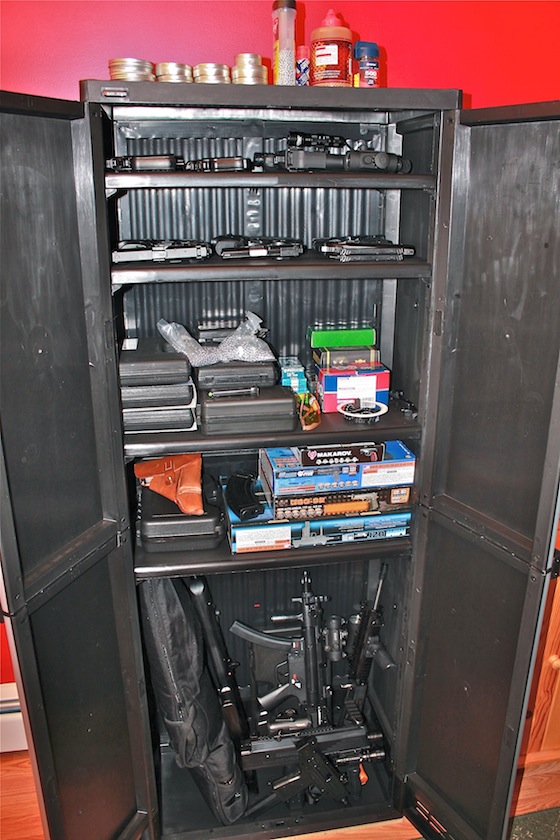
I ran out of room for all my air guns and blank guns in my gun locker a while ago and so I have been on the lookout for a safe way to keep my air and blank guns secured and out of reach.

I have two little kids and I do make a point to keep an unloaded air gun around for them to check out and get used to, (so it's not such a big deal down the road for them). I have started to at least make them aware of what guns are and not to handle guns unless an adult is around and says it's OK. I want them to know early on that guns can be very dangerous when used the wrong way. But thats' another article on it's own!

<!-- google_ad_client = "ca-pub-9036472715040282"; /* Replica Airguns Content */ google_ad_slot = "1487049688"; google_ad_width = 468; google_ad_height = 15; //-->

I have been considering another gun locker or safe but they can be very expensive and are usually limited in size, especially if you're looking for an inexpensive one. In Canada, air guns and non-prohibited blank guns don't technically legally need to be locked in a gun safe or gun cabinet but personally I still feel the need to keep my air and blank guns locked up to some degree. So I thought, what about some sort of a lockable storage or utility cabinet?

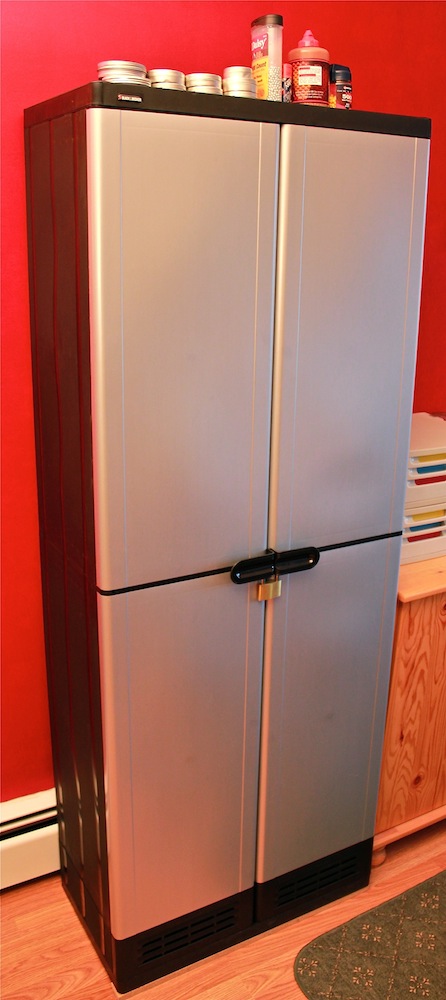
I finally came across what I think is an excellent solution and it didn't cost me an arm and a leg! I went with an upright utility cabinet from Black & Decker (SpaceAir Collection). Mine is 70 inches tall, 15 inches deep, and 27 inches wide. It's made out of sturdy plastic and most importantly it's lockable!

I went with a pretty large utility cabinet as I have lots of air and blank guns but if you have a small to medium air and blank gun collection, you could always get the half size shorter version of this type of unit.

My Vimeo Video showing my Air and Blank Gun Storage solution:

Categories: Accessory, Gun Safety, Replica Airguns News, YouTube Video Tags:

Cybergun - KWC Mini UZI BB Gun Full Auto Modification

39 Comments

Related Posts:

"Before you attempt to do this modification you need to be aware that it may void your warrantee and/or you may fail and either break something or incorrectly reassemble your Mini UZI rendering it "Broked"! This is your problem so please do not attempt this modification (even though it is fairly easy to do) unless you're 100% confident you can do it and are aware of the possible consequences. Make sure to also take into account any gun laws in your area prohibiting full-auto capable firearms!"

(Special thanks to Herman for showing me the ropes on this modification)

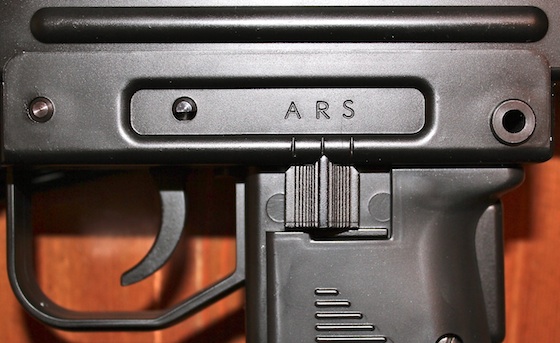
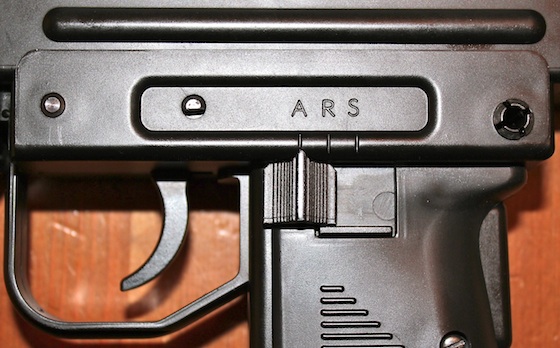
This modification will make your semi-auto "only" Cybergun/KWC Mini UZI BB Gun into a full auto capable 4.5mm BB machine gun. From the factory the full auto switch position (Far Left "A") is disabled but the full auto selector position is visible. The actual full-auto functionality is still present in the Mini UZI but has been decommissioned by the simple means of blocking the selector switch from being moved to the far left full-auto or "A" position.

This full auto modification will show you how to disassemble the Cybergun - KWC Mini UZI BB Gun and remove the small plastic selector switch blockage so you will be able to manually switch between semi auto and full auto modes. This modification takes about 15 minutes to complete.

<!-- google_ad_client = "ca-pub-9036472715040282"; /* Replica Airguns Content */ google_ad_slot = "1487049688"; google_ad_width = 468; google_ad_height = 15; //-->

You will need the following tools: A pair of pliers and either a pair of small wire cutters or a file.

Let's begin! Below are the two pre-modification positions available from the factory:

"S - SAFE"

"R - SEMI AUTO"

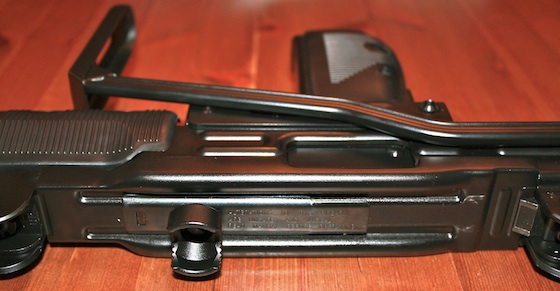
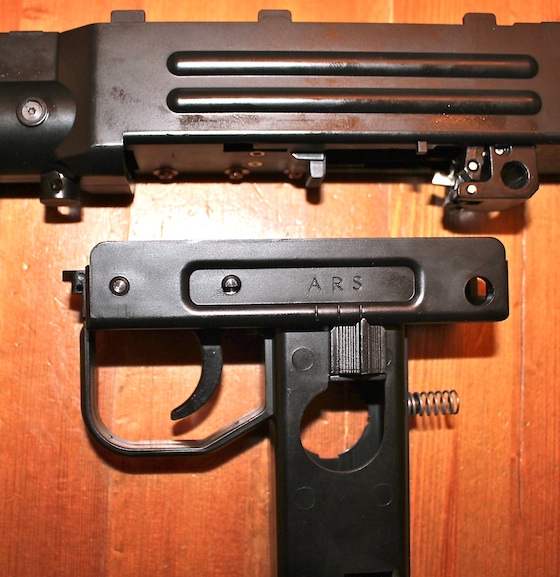
Below is a closeup of the top bolt cover that we will be removing to access the internal bolt for removal:

In the next photo we have removed the bolt cover by pressing the "angled button" towards the rear sight:

And now the bolt is removed:

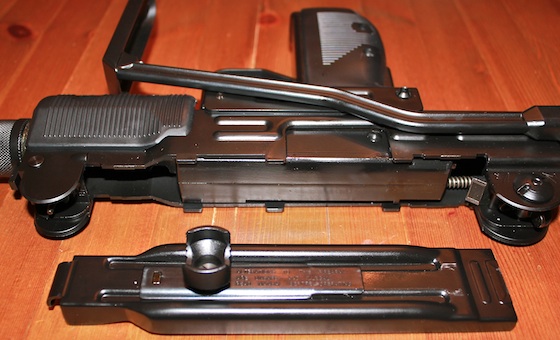
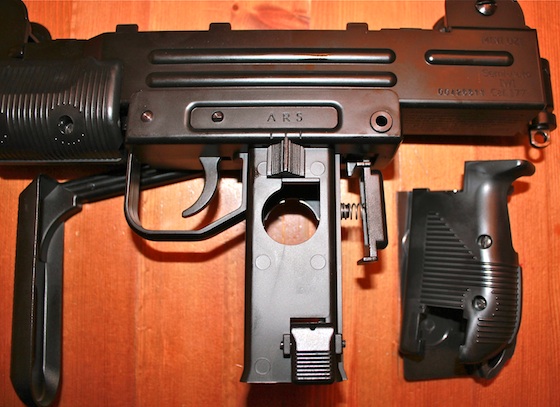
I removed the grips but this is not necessary:

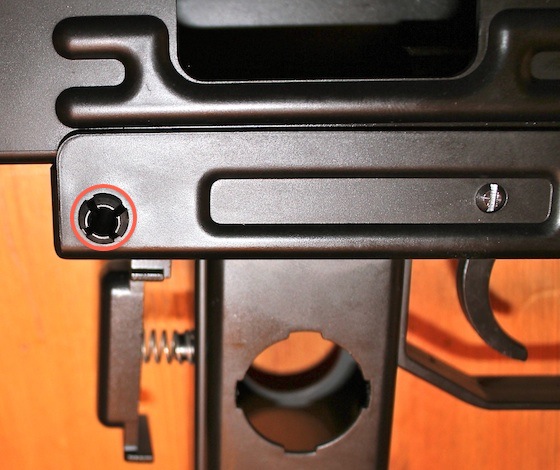
Now you will need to remove the lower receiver pin located at the back end of the receiver closest to the grip safety. Use a pair of pliers to pinch the metal pin while pushing it through. Once the pin is started you can use the pliers on the other side to pull the pin all the way out. You may need to us a fair amount of force to do this as the fit of the pin is tight:

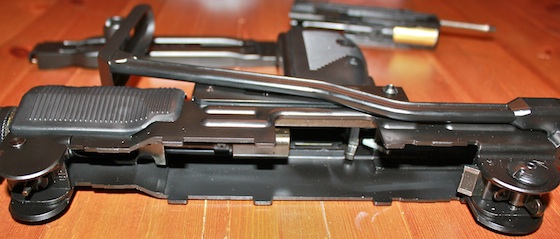
Once the pin is removed the lower receiver can be detached:

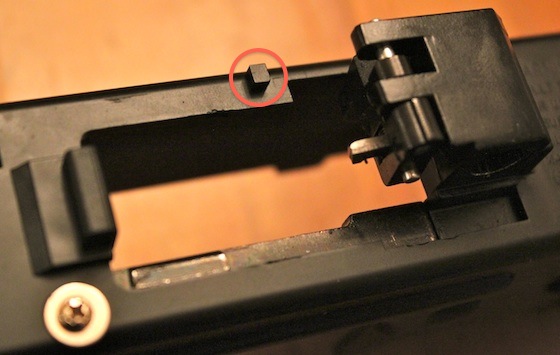
You can see in the picture below the small plastic nub that we will need to remove in order to restore full-auto capability:

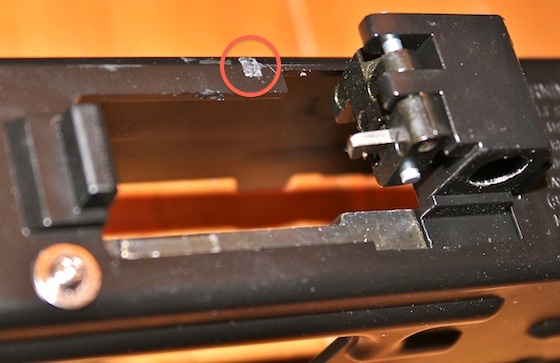
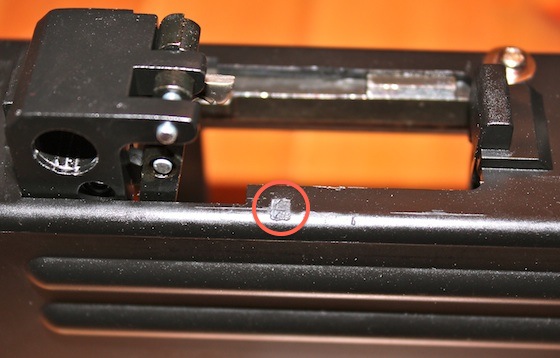
I used a pair of small wire cutters to clip this plastic nub off, but you could use a file too. Just make sure that the plastic is flush and does not have any burs or protrusions.

Below is a photo of the Plastic Nub removed from another angle:

After that, all you need to do is reassemble you Mini UZI in revers order to finnish the Full Auto modification.

In the below Photos you can see we have restored the ability to move the fire selector switch over to the "Far Left" or "A" position, reenabling the Cybergun - KWC Mini UZI BB Gun to shoot in full auto when desired.

"A - FULL AUTO"

Now enjoy your Cybergun - KWC Mini UZI BB Gun in full-auto as it was originally designed!

Here is my Vimeo Video in Narrative with Photos:

Categories: 4.5mm / .177 cal, BB, Blowback, CO2, Full Auto, How To, Modification, Pistol, Semi Auto, YouTube Video Tags: Cybergun, UZI

SIG SAUER X-FIVE P226 TAKE DOWN FOR STRIPPING AND PAINTING

17 Comments

This Article was graciously provided by one of my viewers: Lee

Related Posts:

DISCLAIMER, PLEASE READ AND UNDERSTAND!

  • This walkthrough is for information purposes ONLY, if you decide to dismantle your BB gun you will void any warranty you have with the manufacturer.
  •  I will not be held accountable for your actions or any damage that is caused by your negligence. Therefore, if YOU decide to dismantle your BB gun and break something during the dismantling or assembling it is your problem not mine.
  • If you don’t feel confident or comfortable doing any of these steps STOP and do not proceed any further or you may do damage.
  • YOU WILL LOOSE ALL THE SIG SAUER MARKINGS ON THE GUN.

Having said all that, this is my first ever instructional so I’m going to try and make this walkthrough as easy as I can for you to understand. You will need the following: Flat tip Screwdriver for the grips, Small Philips Head screwdriver, small punch & needle nose pliers – the last 2 are optional.

Make sure you have a clean work space and lay out every part in the order that you remove it Left to Right, come reassembly time you work Right to Left it makes reassembly so much easier.

Step 1:

Field Strip the slide until it looks like this:

Unscrew these 2 screws, these hold in the “Breech Block” once your unscrewed cup the end of the slide in your hand and let the Breech & Screws fall in your hand – Set these aside.

That’s it your Slide should look like this:

It is now ready for paint removal.

Step 2:

Take the Frame and start removing the grips Left hand side first:

Flip the frame over and remove the right hand side grips:

Carefully remove the trigger return spring, it is under tension and it WILL fly across the room – I spent an hour looking for it one day! Also while we are at it, you can remove the cover to the magazine release.

To remove the safety, place your flat tip screwdriver between the frame and the safety and twist ever so gently this will separate the safety and all you need to do now is grab the safety from either side and gently pull & wiggle until it separates.

Once the safety is removed you will see the safety bar, this lifts off.

Step 3:
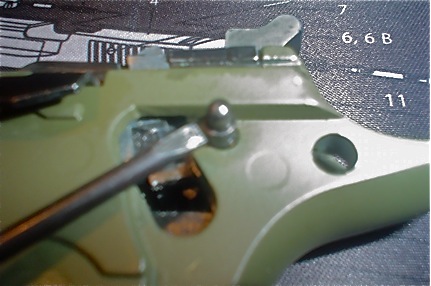
Lift this little pin out and remove the spring, very carefully push this pin from the other side and remove, be careful because once this happens your hammer assembly is loose and free from the frame.

Slowly and gently remove the hammer assembly:

Note the little shiny piece that sits on the side of the hammer assembly, try very hard not to let this piece fly out, it is a pain to get back in, if it does fly out keep calm and take your time, don’t force the little spring in, it seats in behind the shiny metal thing – sorry I don’t have a proper name for it.

Also make sure that the spring next to it is in the locked open position, if it snaps back just get the tip of a small screwdriver and slide it to the left until it locks.
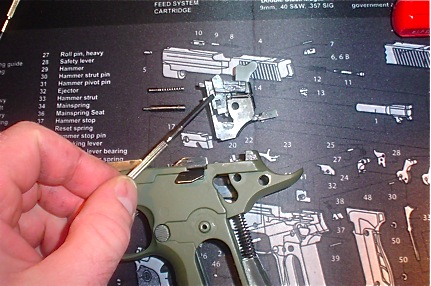
The hammer return spring assembly at the back of the grips can be removed and set aside.

Removing the trigger assembly is easier than it looks; you need to remove the takedown lever by rotating it counter clockwise until it stops.

Push it through the frame and rotate it back clockwise to remove it all together.

Remove the screw holding the trigger assembly:

Lift out the trigger assembly; be careful of the slide lock spring it wont Fly out, but it will fall out.
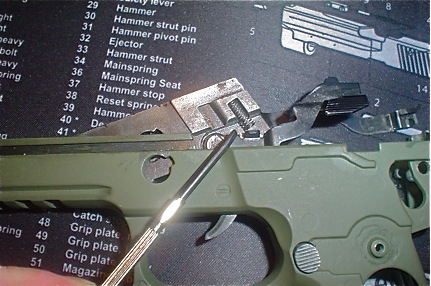
If you want to remove the magazine release, there is a spring that sits at the rear of the trigger guard;

Push the magazine release in part way & with the flat tip screwdriver lifts the up to remove it, once removed the magazine release will simply fall out.

THAT’S IT! We’re done, ready for the paint removal. Any paint stripper is fine.

KEEP IT WELL AWAY FROM THE PLASTIC PARTS!

Follow the manufacturer’s guidelines for use of their product and thoroughly clean the slide and frame after you have removed the paint.

YOU WILL LOOSE ALL THE SIG Sauer MARKINGS ON THE GUN.

Rub over the slide and frame with #0000 Steel wool or 1200 grit Wet & Dry paper. Clean again and using the paper or steel wool with some ALUMINUM polishing compound like Autosol and some good ol fashioned elbow grease polish the slide and frame until you reach your desired outcome. Clean it all down again and wipe it down with a rag that has had gun oil or my preference “Fluid Film”.

Reassemble the gun in the reverse order and viola one shiny SIG Sauer X-Five.

Categories: How To, Modification Tags: Cybergun, Sig Sauer X-Five P226

Air Gun and General Gun Safety Tips

No Comments

Disclaimer:
"This article is only intended as a guide and may not be 100% accurate, please check your areas gun laws and regulations for more information on this subject."

I want to talk about two very important Air Gun safety topics (Any gun for that matter). Those two topics are: Handling and Storing your guns.

In Canada we are required by law to take a gun operation and safety course in order to get our PAL (Possessions and Acquisitions) license. A PAL license is required to purchase firearms and ammunition but is not necessary for most BB and Pellet guns that shoot under 500 fps. Personally, I think a firearms course is a great idea for anyone to take, even if you don't plan on getting a gun but you maybe have some interest or concerns about guns.

The biggest problem with guns is the ignorance surrounding them. I'm not saying people who don't like guns are stupid, but rather that in many cases they simply don't understand guns and it scares them. What's even worse than this is when a firearms owner has no idea on how to properly handle and store their firearms. When you put both of these scenarios together you get a bad combination that in turn makes it more difficult for pro-gun and anti-gun advocates to see eye to eye.

I definitely don't want to start a debate on this issue but rather provide safety information for those choosing to own and operate guns.

General Gun Handling Tips:

  • Make sure you understand your areas gun handling laws.
  • Safety check your gun - Make sure your gun is unloaded (visual inspection) at all times unless you are ready to shoot it. (If you use the gun for home or personal defense and need it to be loaded at all times, make sure to keep it securely holstered or stored in a safe manor so that it does not fall into the wrong hands)
  • Get familiar with your gun while it is unloaded, read the owners manual, learn the workings and features of your gun until you are comfortable with it.
  • If your gun has a safety make sure you know how to operate it but do not become dependent on the safety alone.
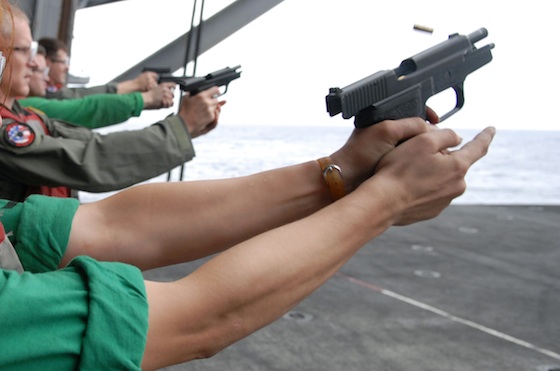
  • Always wear eye protection and if your gun is loud, use appropriate ear protection.
  • Treat your gun likes it's loaded and off of safe mode at all times. The most dangerous gun is one that is believed to be unloaded. Many people treat unloaded guns with less respect than they do a loaded gun and pay a severe price for it when they find out the gun was actually loaded.
  • Only place your finger on the trigger of the gun when you are ready to shoot at your target. The best safety feature on any gun is your trigger finger. When you are not shooting, place your finger across the trigger guard, this acts as a physical barrier helping to protect the trigger from an accidental or unintentional misfire.
  • If you are holding the gun but it is not in use, point it slightly forward but mostly toward the ground. When on a gun range, keep your gun pointed down-range in the direction of the target at all times.
  • Always know what is behind and beyond your target and never shoot over the crest of a hill. Some ammunition can travel several miles and still be dangerous. Even a pellet or BB if shot upwards at a slight angle can travel a few hundred yard and impact a person with enough energy to inflict harm.
  • Don't use your scope as a pair of binoculars to see what is out there. Use binoculars, that's what they are for. Would you like to be at the receiving end of a set of cross-hairs?
  • When you are finished using your gun remove the ammunition, safety check and secure it.

Gun Storage Tips:

  • Make sure you understand your areas gun storage laws.
  • In Canada most  air guns that shoot under 500 fps are not required to abide by the same storage laws as licensed firearms but practicing safe gun storage for any gun is always a good idea.
  • Safety check your gun - Make sure your gun is unloaded (visual inspection) before placing in storage.
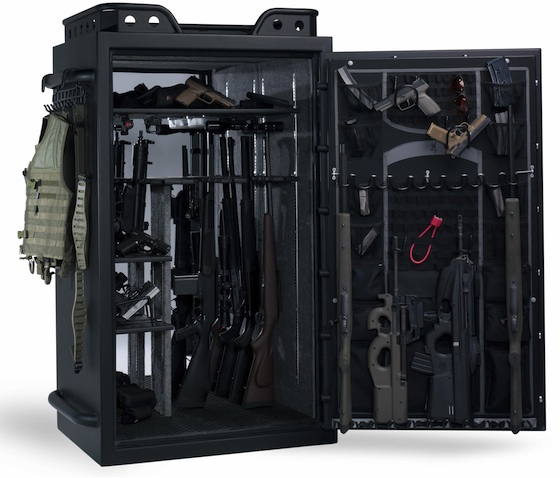
  • Make sure to have at least one level of lock prevention, this could be a gun safe or a gun trigger lock or cable lock. I recommend using a trigger lock on your gun and placing it in a gun safe. Keep your gun safe or case keys in a secure area out of sight.
  • Keep your ammunition and firearms in different locations. This is not necessary in Canada but a good general idea.
  • Keep your firearms out of sight and keep the temptation out of the picture.
  • If you have a dedicated home defense gun that you want easy access to, keep it in a gun safe beside your bed with an easily accessible touchpad combination lock. You can have a loaded magazine in the safe with your gun, just not in the gun. (This scenario is Canada Gun Law Friendly!)
  • Gun storage laws when transporting your firearm are often different than when storing a gun in your home, make sure you understand these laws in your area. For example: In Canada we have to have an "ATT" transportation permit (Authorization to Transport) that allows a gun holder to transport their firearm from their home and to the range and/or to a gun smith. Any detours from point A to point B must be within reason. (No dropping by the bar on the way home from the gun range) Furthermore, licensed pistols must be unloaded and trigger locked in a hard shell case that also has a lock on it. Ammunition is not allowed in the case with the gun in transport and your gun needs to be in the trunk of your car or in an out of sight area if you have a truck.

Hopefully you have gotten at least something out of this gun handling and storage awareness article. My hope is that many of you will take this to heart and if you don't already practice safe gun handling and storage, you will start today!

Related Links:

Please feel free to spread the word and link to this Article and YouTube video on the same subject.

Here is my YouTube Video on Air Gun and General Gun Safety Tips:

Click on Links/Photos below to BUY related Gun Safety items:


Categories: Gun Law, Gun Safety, YouTube Video Tags: