Entries in How To,Q&A Video

Airgun Usage for Hunting and Pest Control

2 Comments

This may be a bit controversial for some people who don't like the thought of using an gun for hunting or extermination of unwanted pests. But weather or not it is accepted by all, it is a practice that many people still embrace including myself when done in a humane way.

Let's start off by addressing this topic by asking some questions and filling in some of the answers. Keep in mind I go into much more detail in my Vimeo video below.

What is the reason that you need to Shoot or Hunt an Animal?

Are you shooting an animal out of need or just for fun, sure there is a thrill in the sport of hunting but after taking down your prey, the animal should not be killed in vain as the meat should be eaten. There are also times when pesky critters get into your gardens, tree farms, feeding stations garbages and who knows what else? I personally think shooting an animal that has not done you any harm or that you don't plan on eating is not ethical. So question your motives wisely?

Can you use an Airgun for Hunting and or Pest Control?

The short answer is yes! As long as you choose the correct Airgun for the job, one that has enough power and accuracy to get the job done in a humane manner. Using an underpowered or inaccurate gun of any type for the chosen target will lead to the animal being wounded and possibly getting away to suffer unnecessarily.

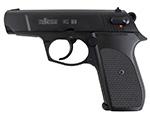
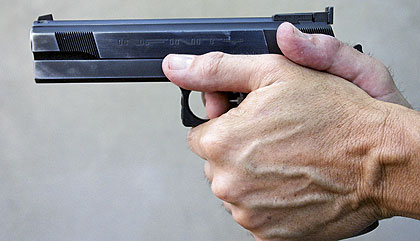
What about Pistols versus Rifles?

Given the choice, a rifle will always be your best bet, rifles tend to be more accurate since they are more stable to hold and the fact that the sights are further apart which improves the guns accuracy. Most rifles also allow for enhanced sighting systems like red dots or magnified scopes for even further accuracy improvements. There are some pistols made specifically for hunting and target shooting that can be accurate but I would limit their use to shorter ranges.

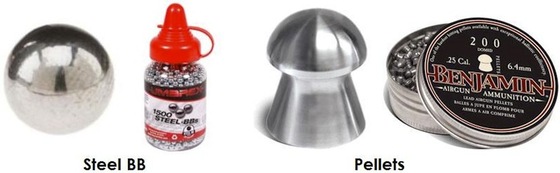
What about Pellet guns versus BB guns?

BB guns in general are not meant for hunting or pest control, and in most cases they are underpowered and not as accurate as their pellet shooting counterparts, especially out at longer ranges where most pests keep their distances to. If you plan on doing some hunting and or pest control, please invest in an adequate pellet rifle to get the job done humanly.

What type of Ammo is best for Hunting and Pest Control?

There are lots of types of pellets available, pointed, rounded, flat, hollow-point and even pellets that have nylon tips. At the end of the day, use the pellet that is the most accurate in your Airgun because shot placement will win over pellet shape any day of the week. The reality is that as long as that pellet hits the target with adequate velocity, it doesn't matter what shape it is, it's more than likely going to pass right through the animal.

What is the lowest FPS that I can use?

I would rather ask the question, what is the highest fps I can get away with since more fps will give you more margin for error, since it will have a flatter trajectory and will do more damage even if your shot is off a bit. An experienced shooter could make a kill shot on a small pest even with a 400 fps airgun but the shot would have to be perfect and the range would have to be close. Of course when shooting larger game, you will need larger caliber pellets with higher velocities. Also when using a high velocity airgun you need to consider what is beyond your target, if you miss, where is that pellet or bullet going to end up? You need to make sure you do not injure anyone by mistake as pellets/bullets can travel a long distance.

How large of an Animal can an Airguns Kill?

This is really dependent on the Airgun being used, Airguns come in many different calibers, from .177 right up to .50 caliber, some PCP Airguns can even take down a deer! You need to do your research and make sure the Airgun you choose has both the power and accuracy you need for the intend prey.

Where can I use an Airgun for Hunting and or Pest Control?

This is a question you need to ask your local authorities as laws and hunting regulations are different just about everywhere. Even shooting pests on your property may require a permit so be careful to obey your local laws.

Categories: .20 cal, .22 cal, 4.5mm / .177 cal, BB, Break Barrel, Bulk Air, CO2, Comparison, Full Auto, How To, PCP, Pellet, Pistol, Rifle, Scope, Semi Auto, YouTube Video Tags:

How to Load Your Air Pistol

No Comments

In many of my reviews I show the loading process of each gun but sometimes I either skim over this part or assume most people already know how to load an Air Pistol and skip it entirely. Well as it turns out not everybody does know how to load up an Airgun or they are unclear on certain areas, like do you actually need the CO2 and how long can you leave CO2 in an airgun?

So I made a video specifically to cover how to load CO2, BB's and/or Pellets into your Air Pistol.

Now even though this video is targeted at 4.5mm Steel BB and Lead Pellet Pistols, there is a crossover with 6mm Airsoft Pistols so this video may also help an Airsoft shooter.

Our Family Bearded Dragon (Dijon) was looking rather sad and lonely today so I figured he could hang out while I made the video, he really doesn't do much of anything most of the time so why not give him a special appearance in one of the Replica Airguns Videos ;)

Categories: 4.5mm / .177 cal, BB, Blowback, CO2, How To, Pellet, Pistol, Semi Auto, YouTube Video Tags:

Will this Ammunition Work in my Gun - Can I Convert a Blank Gun to a Real Gun?

3 Comments

Two questions that come up over and over again and to be honest I just hate answering, mainly because both of these questions to me are kind of common sense questions. I feel if someone where to stop and actually think about teh question, the answers would become obvious.

That said, common sense has to be learned somewhere and not all of us are exposed to the same life experiences so here goes...

The two questions are:

  • Will this Ammunition Work in my Gun?

  • Can I Convert a Blank Gun to a Real Gun?

The answer for both of these question is actually the same! Use the ammo made for your gun and do not try to use anything other than the ammo that was made for your gun. Do not try to modify your gun to shoot anything other than the ammo that was made for it, if you do, you may be breaking the law and could land yourself in jail. If you can follow these rules then your ammo and gun will work as intended :)

So that's pretty much it in a nutshell, watch my YouTube video below as I show you examples of ammo types with visuals on exactly why you need to use the ammo made for your gun. I also talk about the dangers of attempting to modify a blank gun to shoot some sort of real bullet and why it is a very bad idea in so many ways to try and convert a blank gun into a real gun.

rohm RG-88.jpg
Categories: Gun Law, Gun Safety, How To, Real Gun, YouTube Video Tags:

How to Align Your Gun Sights on Target

No Comments

This video should go "Hand in Hand" (pun intended) with my Best Two Handed Pistol Grip Tutorial Video that I did last year back in August. After that video I had several people ask me to talk about how to aim a gun. I guess if you have been shooting guns for a while you kind of take it all for granted but after teaching my kids the proper way to aim a gun at a target, this info is not naturally born into us ;)

This video demonstrate how and where to place your open gun sights on a target and also how you can compensate for a gun that may not be perfectly sighted in.

Categories: How To, YouTube Video Tags:

Testing Out LED Lighting with my F1 Chrony Chronograph - Take 2

No Comments

This is take 2 of my Modification to my F1 Chrony Chronograph. The purpose of this modification is to improve the low light FPS readings. In my first attempt I used LED Puck Lights but they where the kind that used flat panel LED's and they only had 4 panels per LED Puck which made each LED panel kind of bright. I did get OK with my first mod using LED Puck Lights but not as good as I would like to see.

So here we are with take 2 of F1 Chrony Chronograph LED Puck Light modification and this time around I am using standard bulb styled LED lights and to improve my chances of this working I went with and LED Puck that contained 24 LED bulb lights per puck, this way each light on it's own is a bit dimmer which I feel will give a more diffused lighting effect and hopeful consistent fps readings.

By the way I got these LED Puck Lights at my local dollar store for $2.50 each so not a very expensive modification, especially if they work.

Well... Watch the video and see how they perform...

Categories: How To, YouTube Video Tags:

Testing Out LED Lighting with my F1 Chrony Chronograph

No Comments

This video was made to show you the results I got by mounting LED puck lights to the top of my F1 Chrony Chronograph defuser panel in order to improve the low light Feet Per Second readings when using 4.5mm Steel BB's.

I have been struggling with my F1 Chrony Chronograph during the fall and winter months as tit becomes overcast and dark where I live. There have been days where I have gone out to shoot my field test shooting video and not been able to get any Chronograph fps results which is very frustrating because much time and effort goes into the planning setup of each video.

I was given advice from several of my viewers to mount an LED puck style light on the back side of my Chronograph defuser panel and that this helps the Chronograph to read much better in low light situations.

I bought a multipack of the LED puck lights from my local Costco but they did not work as well as I expected them to as they had a panel style of LED rather than the bulb shaped LED which I think may diffuse the light a bit more. My next experiments will be done using LED Puck lights but with the bulb styled LED.

You can watch my video to see how my first attempt using an LED Puck light with my F1 Chrony Chronograph worked out.

Categories: How To, YouTube Video Tags:

How to Handle Your Gun Safely

4 Comments

In this informative video I go over the very basics of gun "handling" safety. I don't talk about gun storage or even shooting of the gun, I strictly go over the main aspects of handling a gun in a safe manor.

These are the four main points I demonstrate in this video:

  • Fingers off the trigger till you are ready to shoot.

  • Keep the gun unloaded till you are ready to shoot it.

  • Assume your gun is loaded at ALL times.

  • Always point your gun in a safe direction.

Hopefully this video will prevent some unfortunate accidents, even airgun related accidents can cause serious injuries which in most cases can be prevented with the correct gun handling information.

I have made a

similar safety video

where I talk about general gun safety and speak more about storing and also some gun shooting safety tips.

Categories: Gun Safety, How To, YouTube Video Tags:

How to Make a New Gun Look Vintage - Old and Worn

1 Comment

You really need to watch my Vimeo Video to see how easy it is to take a brand new out of the box gun and give it that weathered, old, worn and used look that you would find in a classic vintage gun like a Luger P.08, Colt 45 1911 or any other classic firearm. Of course this is something you would do to a new gun that you want to make look old :)

This is a great way to take a gun that already has some wear marks on it and really give it the full worn in look, kind of an alternative to having to touch it up or refinish it.

Here is a hint... I use something magical to do it!

Categories: 4.5mm / .177 cal, BB, CO2, How To, Pistol, Semi Auto, YouTube Video Tags: Luger P08, Umarex

Best Two Handed Pistol Grip Tutorial Video

No Comments

One of the most important keys to shooting accurately is how you grip the gun! In this video I show you the two handed grip that I use and that I have learned from watching other accurate shooters. I also talk about arm and shoulder placement which is more important when shooting large caliber pistols but even when shooting airguns that have virtually no recoil you may as well practice the correct hand arm and shoulder placement for when and if you do start shooting heavy recoil guns.

The main hand grip points I talk about in this video are how to overlap your finders and thumbs and also the pressure used by each hand that will make all the difference down range when shooting at targets.

Watch my Vimeo Tutorial Video on the Best Two Handed Pistol Grip:

Categories: How To, YouTube Video Tags: Hand Grip

Cybergun KWC Tanfoglio Witness 1911 Stuck BB Removal Tutorial

5 Comments

Every once in a while something goes wrong and your favorite BB shooter stops working as it should :( One of the most common problems I see with many of the full blowback BB and Airsoft pistols are BB's getting stuck in the gas tube. This is because this style of gun loads a BB into the breach area of the barrel every time you rack the slide forward. Of course this is only when there are BB's in the magazine.

The semi auto style of these guns is similar to that of a real gun, the blowback operates the slide which in turn moves back and then forward and loads a BB into the chamber. With a real gun, if you where to rack the slide manually again without shooting it, the chambered round would be ejected by the extractor but with a BB gun there is no extractor because there is no spent shell to eject. So multiple BB's can be loaded into the chamber area of the barrel overloading it and if the BB's have nowhere to go they just jam up and often go back into the gas tube which can cause all kinds of problems...

In this Cybergun KWC Tanfoglio Witness 1911 Stuck BB Removal Tutorial Video, I show you how to remove a BB or even multiple BB's from the gas tube area which in short requires; the removal of the slide and guid rod and spring so that you can push the gas tube forward and shake the BB out of the front of the gas tube.

Watch my Vimeo Video on how to remove a stuck BB from the Gas Tube on my Tanfoglio Witness 1911.

Categories: 4.5mm / .177 cal, 6mm, Airsoft, BB, CO2, How To, Pistol, Semi Auto, YouTube Video Tags: Cybergun, KWC, Tanfoglio Witness 1911

Cybergun Sig Sauer P226 GBB Blowback Airsoft Pistol Red Barrel Tip Mod

6 Comments

I have not done my official Table Top and Shooting Reviews for the Gas Blowback Airsoft Cybergun Sig Sauer P226 but I really wanted to cut off the ugly orange painted barrel tip, it was kind of driving me crazy! keep in mind here in Canada we are not required to have orange tips on our Airsoft guns, most of the all metal or all black Airsoft guns imported these days fall into the "airgun uncontrolled firearms" category. If you live in the US or other parts of the world you could be breaking the law if you do this mod so be warned...

Your best best is to simply watch my Vimeo Video as I show you exactly how I removed the orange painted portion of the metal barrel using a hack saw, file, vice and some sand paper. All in all it was not too difficult and only took about 15 minutes to complete...

Categories: 6mm, Airsoft, Blowback, GBB, How To, Modification, Pistol, Semi Auto, YouTube Video Tags: Cybergun, Sig Sauer P226

How To Clean Air Guns & Blank Guns Tutorial

11 Comments

I have been asked so many times to make a "How To Video" on cleaning Airguns and Blank Guns so I thought I better make the video so people stop asking me to make one :) and if they do ask, which I am sure they still will, then I will be able to direct them to this awesome video tutorial...

So basically in this video I clean an Airgun that can be field stripped and I also clean an Airgun that can not easily be field stripped. I then clean a blank gun even thought the process is very much the same.

I also talk a bit about cleaners and general air gun maintenance but for the most part I just show you how to clean the guns so watch the video!

Categories: BB, Blank Gun, How To, Pellet, Pistol, YouTube Video Tags:

Trigger Action Explained - SAO - DAO - Single & Double Action

2 Comments

I have found one of the more confusion aspects of guns is what defines the trigger action, and I confused this a lot at first but now feel I have a good understanding of what makes a gun Single Action Only, Double Action Only or Single and Double Action.

Your best bet is to watch my attached Vimeo video as it not only describes trigger actions but also has the added benefit of the visual examples of each type of trigger action.

Here is a very quick explanation of what constitutes each type of trigger action:

First off the action is based on the role of the trigger in how it effects the action, not how the slide or the hammer can effect the action of the gun.

A Single Action Only gun does one action (a single action) and that is generally the releasing of the hammer or striker or what have you... Single Action Only guns can not fire without first manually pre-cocking the external hammer or manually pulling the slide or charging handle back first to chamber a round and also pre-cock the action of the gun. Keep in mind that the blowback of the slide or bolt in semi and full auto guns effectively cocks the action of the gun allowing for single action trigger release.

A Double Action Only gun performs dual functions, the pre-cocking of the hammer or striker in the first stage and the releasing of the hammer or striker in the second stage, therefore performing two actions. Double Action Only guns do not have the ability to pre-cock the hammer or striker fully and therefore generally have a heavier trigger pull as the first stage of the trigger is to cock the sprung hammer or internal action.

<!-- google_ad_client = "ca-pub-9036472715040282"; /* Replica Airguns Content */ google_ad_slot = "1487049688"; google_ad_width = 468; google_ad_height = 15; //-->

Single and Double Action guns have the ability to do both, meaning they can be pre-cocked and then fired or fired without pre-cocking simply by pulling the trigger.

Keep in mind that there are some guns that fall in to their own category, take for example the Glock. Glock has been known to actually describer their guns as Double Action Only, when in fact they can not be fired without the slide first being pulled back to partially pre-cock the internal striker - similar to a single action gun. But when you pull the trigger on a Glock you do not simply release the action but rather the trigger first pulls the striker action back the final stage in order to release it, similar to a double action gun.

Again, watch my Vimeo video as I hope the visuals will help you to understand the differences between Single Action Only, Double Action Only and Single and Double Action trigger.

Categories: How To, YouTube Video Tags:

Cybergun - KWC Mini UZI BB Gun Full Auto Modification

39 Comments

Related Posts:

"Before you attempt to do this modification you need to be aware that it may void your warrantee and/or you may fail and either break something or incorrectly reassemble your Mini UZI rendering it "Broked"! This is your problem so please do not attempt this modification (even though it is fairly easy to do) unless you're 100% confident you can do it and are aware of the possible consequences. Make sure to also take into account any gun laws in your area prohibiting full-auto capable firearms!"

(Special thanks to Herman for showing me the ropes on this modification)

This modification will make your semi-auto "only" Cybergun/KWC Mini UZI BB Gun into a full auto capable 4.5mm BB machine gun. From the factory the full auto switch position (Far Left "A") is disabled but the full auto selector position is visible. The actual full-auto functionality is still present in the Mini UZI but has been decommissioned by the simple means of blocking the selector switch from being moved to the far left full-auto or "A" position.

This full auto modification will show you how to disassemble the Cybergun - KWC Mini UZI BB Gun and remove the small plastic selector switch blockage so you will be able to manually switch between semi auto and full auto modes. This modification takes about 15 minutes to complete.

<!-- google_ad_client = "ca-pub-9036472715040282"; /* Replica Airguns Content */ google_ad_slot = "1487049688"; google_ad_width = 468; google_ad_height = 15; //-->

You will need the following tools: A pair of pliers and either a pair of small wire cutters or a file.

Let's begin! Below are the two pre-modification positions available from the factory:

"S - SAFE"

"R - SEMI AUTO"

Below is a closeup of the top bolt cover that we will be removing to access the internal bolt for removal:

In the next photo we have removed the bolt cover by pressing the "angled button" towards the rear sight:

And now the bolt is removed:

I removed the grips but this is not necessary:

Now you will need to remove the lower receiver pin located at the back end of the receiver closest to the grip safety. Use a pair of pliers to pinch the metal pin while pushing it through. Once the pin is started you can use the pliers on the other side to pull the pin all the way out. You may need to us a fair amount of force to do this as the fit of the pin is tight:

Once the pin is removed the lower receiver can be detached:

You can see in the picture below the small plastic nub that we will need to remove in order to restore full-auto capability:

I used a pair of small wire cutters to clip this plastic nub off, but you could use a file too. Just make sure that the plastic is flush and does not have any burs or protrusions.

Below is a photo of the Plastic Nub removed from another angle:

After that, all you need to do is reassemble you Mini UZI in revers order to finnish the Full Auto modification.

In the below Photos you can see we have restored the ability to move the fire selector switch over to the "Far Left" or "A" position, reenabling the Cybergun - KWC Mini UZI BB Gun to shoot in full auto when desired.

"A - FULL AUTO"

Now enjoy your Cybergun - KWC Mini UZI BB Gun in full-auto as it was originally designed!

Here is my Vimeo Video in Narrative with Photos:

Categories: 4.5mm / .177 cal, BB, Blowback, CO2, Full Auto, How To, Modification, Pistol, Semi Auto, YouTube Video Tags: Cybergun, UZI

SIG SAUER X-FIVE P226 TAKE DOWN FOR STRIPPING AND PAINTING

17 Comments

This Article was graciously provided by one of my viewers: Lee

Related Posts:

DISCLAIMER, PLEASE READ AND UNDERSTAND!

  • This walkthrough is for information purposes ONLY, if you decide to dismantle your BB gun you will void any warranty you have with the manufacturer.
  •  I will not be held accountable for your actions or any damage that is caused by your negligence. Therefore, if YOU decide to dismantle your BB gun and break something during the dismantling or assembling it is your problem not mine.
  • If you don’t feel confident or comfortable doing any of these steps STOP and do not proceed any further or you may do damage.
  • YOU WILL LOOSE ALL THE SIG SAUER MARKINGS ON THE GUN.

Having said all that, this is my first ever instructional so I’m going to try and make this walkthrough as easy as I can for you to understand. You will need the following: Flat tip Screwdriver for the grips, Small Philips Head screwdriver, small punch & needle nose pliers – the last 2 are optional.

Make sure you have a clean work space and lay out every part in the order that you remove it Left to Right, come reassembly time you work Right to Left it makes reassembly so much easier.

Step 1:

Field Strip the slide until it looks like this:

Unscrew these 2 screws, these hold in the “Breech Block” once your unscrewed cup the end of the slide in your hand and let the Breech & Screws fall in your hand – Set these aside.

That’s it your Slide should look like this:

It is now ready for paint removal.

Step 2:

Take the Frame and start removing the grips Left hand side first:

Flip the frame over and remove the right hand side grips:

Carefully remove the trigger return spring, it is under tension and it WILL fly across the room – I spent an hour looking for it one day! Also while we are at it, you can remove the cover to the magazine release.

To remove the safety, place your flat tip screwdriver between the frame and the safety and twist ever so gently this will separate the safety and all you need to do now is grab the safety from either side and gently pull & wiggle until it separates.

Once the safety is removed you will see the safety bar, this lifts off.

Step 3:

Lift this little pin out and remove the spring, very carefully push this pin from the other side and remove, be careful because once this happens your hammer assembly is loose and free from the frame.

Slowly and gently remove the hammer assembly:

Note the little shiny piece that sits on the side of the hammer assembly, try very hard not to let this piece fly out, it is a pain to get back in, if it does fly out keep calm and take your time, don’t force the little spring in, it seats in behind the shiny metal thing – sorry I don’t have a proper name for it.

Also make sure that the spring next to it is in the locked open position, if it snaps back just get the tip of a small screwdriver and slide it to the left until it locks.

The hammer return spring assembly at the back of the grips can be removed and set aside.

Removing the trigger assembly is easier than it looks; you need to remove the takedown lever by rotating it counter clockwise until it stops.

Push it through the frame and rotate it back clockwise to remove it all together.

Remove the screw holding the trigger assembly:

Lift out the trigger assembly; be careful of the slide lock spring it wont Fly out, but it will fall out.

If you want to remove the magazine release, there is a spring that sits at the rear of the trigger guard;

Push the magazine release in part way & with the flat tip screwdriver lifts the up to remove it, once removed the magazine release will simply fall out.

THAT’S IT! We’re done, ready for the paint removal. Any paint stripper is fine.

KEEP IT WELL AWAY FROM THE PLASTIC PARTS!

Follow the manufacturer’s guidelines for use of their product and thoroughly clean the slide and frame after you have removed the paint.

YOU WILL LOOSE ALL THE SIG Sauer MARKINGS ON THE GUN.

Rub over the slide and frame with #0000 Steel wool or 1200 grit Wet & Dry paper. Clean again and using the paper or steel wool with some ALUMINUM polishing compound like Autosol and some good ol fashioned elbow grease polish the slide and frame until you reach your desired outcome. Clean it all down again and wipe it down with a rag that has had gun oil or my preference “Fluid Film”.

Reassemble the gun in the reverse order and viola one shiny SIG Sauer X-Five.

Categories: How To, Modification Tags: Cybergun, Sig Sauer X-Five P226